You’re about to learn how to flake salmon like a pro, and you’ll find it easier than you reckon. Start upon picking a boneless or skin-on fillet and check for pin bones, then pat it dry and season lightly. Choose a gentle cooking method such as poaching, steaming, slow roasting, or sous vide, and cook until the center reaches 125 to 130°F. Let it rest a few minutes, lift the skin should it loosen, then find the grain and use a fork or angled spatula to lift flakes along the grain from one end toward the tail, removing any stray bones as you go; collect the flakes in a shallow bowl and cool briefly before storing, and keep reading to master each step.
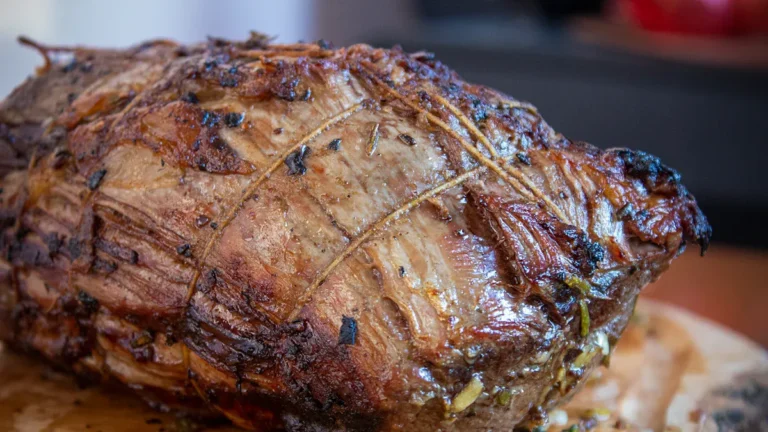
Choose the Right Cut of Salmon
Pick a cut that matches how you plan to cook and serve the salmon, because the cut changes texture and flavor more than you could expect.
You’ll want thicker center cuts for baking and flaking gently, and thinner tail pieces if you’re searing fast.
Consider wild caught vs. farmed and how that affects flavor profiles.
Wild caught often tastes leaner and brighter, so it flakes into firmer pieces.
Farmed tends to be richer and oilier, so it yields silky, tender flakes.
Choose skin-on portions if you like a crisp edge when pan-searing, or skinless for easy shredding after baking.
Trust your instincts and the meal you visualize.
You belong at the counter making something that feels like home.
Check for Bones and Skin
Before you start flaking, run your fingers along the flesh to feel for any stubborn bones and check the skin for looseness or crisp edges. You’ll want to work slowly and invite others into the task should you like company.
Use tweezers or fish pliers for careful bone removal, pulling in the direction the bone sits so the flesh stays neat. In case the skin peels away easily, lift a corner and slide a thin spatula under it.
For thicker skin or bits that cling, do gentle skin trimming with a sharp knife held flat and steady. Keep your hands warm and your space tidy. This helps you feel confident and connected to the food and to whoever you’re cooking for.
Pat the Fillet Dry and Season Lightly
Start beside laying the fillet skin-side down on a clean board and gently patting the flesh with kitchen paper until it feels dry to the touch. You’ll use the paper towels technique to lift surface moisture without tearing the flesh. Pat gently, then turn the fillet and repeat should it be needed.
Next, sprinkle salt evenly and follow light seasoning timing through letting the fish rest about 10 to 15 minutes so the salt draws out excess liquid. During that rest, blot away the pooled juices with fresh paper towels.
You’ll feel connected to the process as the fillet firms slightly and smells clean. This careful prep sets you and your fellow cooks up to cook confidently and create tender, flaky pieces everyone will enjoy.
Select a Gentle Cooking Method
Now that the fillet is dry and lightly seasoned, you’ll want a gentle cooking method that keeps the salmon moist and easy to flake.
Low heat techniques like poaching or steaming cook the fish slowly so it stays tender and won’t overcook at the edges. Try simmering in a flavored broth or wrapping the fillet in parchment to steam it, and you’ll notice the texture stays delicate and forgiving whenever you go to flake it.
Low-heat Options
You’ll often want to choose a gentle, low-heat method whenever you desire tender, flaky salmon that stays moist and delicate. You’re making a choice that treats the fish with care.
Slow roasting at low oven temperatures and sous vide cooking both give you control and consistent results. They prevent overcooking and keep the flesh silky.
You’ll feel proud whenever flakes separate easily without drying.
- Slow roasting: set a low temp, monitor with a thermometer.
- Sous vide cooking: seal, set precise temperature, finish with quick sear.
- Gentle rest: let salmon sit briefly to redistribute juices.
- Finish touch: remove skin when it lifts and flake along fibers.
These options welcome you into reliable, repeatable cooking that builds confidence.
Poaching & Steaming
Once you choose poaching or steaming, you’re picking a gentle way to cook salmon that keeps it silky and tender while making flaking easier.
You’ll feel confident using a shallow court bouillon to poach; add aromatics like lemon, bay, and peppercorns for warmth.
Place fillets skin-side down, simmer gently 8–10 minutes, then lift to rest.
Should you prefer steaming, arrange salmon in steam baskets over simmering water or use parchment packets to trap flavor.
Both methods prevent overcooking and help flakes form along natural fibers.
Patience matters here.
Let fillets cool a bit, then remove skin if it peels away.
You’ll join others who find these gentle ways reliable, friendly, and forgiving for perfect flakes.
Cook to the Proper Internal Temperature
You want your salmon safe and delicious, so aim for the right internal temperature before you stop cooking. Use an instant-read thermometer and pull the fish at 125°F to 130°F for moist, slightly pink flakes that are safe and tender.
Let the fillet rest a few minutes before flaking so juices settle and the texture firms up for easier, prettier flakes.
Safe Internal Temperature
While cooking salmon, aim for a safe internal temperature so you feel confident serving it to family and friends. Use an internal thermometer and check the thickest part. Insert the probe from the side and avoid touching bone. Look for 125 to 130°F for medium doneness. Keep in mind carryover cooking will raise temperature a few degrees after you remove the fish.
- Calibrate your thermometer regularly for accuracy.
- Take readings in several spots on thicker fillets.
- Pull salmon a few degrees below target to allow carryover cooking.
- Trust texture and thermometer together for best results.
You belong at the table. These steps help you cook safely while keeping salmon moist and easy to flake.
Rest Before Flaking
After the salmon reaches the target internal temperature, let it rest for a few minutes before you start flaking so the juices can redistribute and the texture firms up.
You’ve cooked it right, and now you give it a gentle cooling time to finish. That carry over heat keeps cooking a touch, so resting prevents overdone edges and makes flakes tender.
While it rests, you’ll notice the surface becomes less shiny and feels firmer, which helps whenever you break it apart.
Invite others to watch or chat while it cools; that shared pause builds connection and keeps you calm.
At the moment you pick it up to flake, use gentle strokes along the grain so each bite feels deliberate and welcome.
Rest the Salmon Before Flaking
Letting the salmon rest for 10 to 15 minutes after salting makes a big difference in texture and flavor. You’ll notice the carryover rest and ambient cooling let juices redistribute, so flakes stay moist without being soggy. Treat this time as part of cooking, not wasted wait. You’ll feel more confident whenever you flake.
- Let salted fillets sit so salt draws out and then reabsorbs moisture.
- Use a tray at room temperature for gentle ambient cooling.
- Pat away pooled liquid after the rest to avoid mushy flakes.
- Give the fish a short carryover rest after cooking to finish gently.
These steps help you belong to a kitchen rhythm, calming your nerves and improving every bite.
Use the Right Tools for Flaking
Choose tools that make flaking easy and calm, not stressful, so you enjoy the process and get perfect flakes every time. You want tools that feel like friends in the kitchen. Reach for non scratch tools so your pans stay safe and your salmon looks great.
Use a fork for small flakes, or an angled spatula whenever you need longer gentle strokes. Pair those with wooden chopsticks or a silicone scraper to vary pressure and control. Keep tweezers nearby for any stray pin bones. Have a shallow bowl ready to collect flakes and a clean board for resting.
These choices help you move smoothly from cooked fish to plated dish. You’ll feel confident, connected to the food, and proud to share the result.
Flake Along the Grain With Gentle Motions
Initially, find the natural grain of the cooked salmon by looking for the lines where the muscle fibers run.
Then use gentle pressure with a fork or your chosen tool and flake along those fibers so the pieces stay tender and well shaped.
You’ll notice the flakes come apart easily whenever you follow the grain and keep your movements soft and steady.
Find the Grain
How do you spot the grain of a cooked salmon so you can flake it gently? Look for visual cues like the lines where the flesh separates and the glossy seams between layers. The fiber direction runs from head to tail in most fillets, so orient the fish that way before you begin.
- Scan the top for long parallel lines that show fiber direction.
- Tilt the fillet to catch light and reveal subtle seams.
- Gently press a fingertip to find soft breaks between layers.
- Check the thickest part initially to confirm the pattern.
You belong at the stove and you deserve success. Notice these signs, trust your touch, and the fish will fall into neat flakes that feel made for sharing.
Use Gentle Pressure
Often you’ll want to use gentle pressure while flaking cooked salmon, because soft, careful motions protect the texture and keep each piece tender.
You’ll initially find the grain, then apply pressure lightly with a fork, spatula, or chopstick.
Use controlled strokes that follow the muscle lines.
Move slowly so you avoid mashing the fish and so flakes form naturally.
In case a section resists, pause and change angle rather than forcing it.
Your hands will learn a rhythm, and others at your table will notice the care you give.
Gentle motion also helps you maintain texture and keep moisture where it belongs.
These steps build confidence, help you serve consistent flakes, and let everyone feel welcome at your table.
Flake With Fork Fibers
Reach for a fork and let the grain of the salmon guide you as you gently tease the fillet into flakes. You want to feel connected to the food and to the people you’ll feed, so use a calm, steady fork technique. Follow the fiber direction and move the tines along the lines, not across them. Keep motions light and steady.
Recall these friendly tips:
- Start at one end and work toward the tail to keep flakes uniform.
- Use shallow strokes to preserve moistness and texture.
- Remove skin after you see it separate for easier flaking.
- Check for pin bones and pull them out with tweezers.
You’ll feel confident as you work, and your care will show in each tender, even flake.
Remove Remaining Skin and Bones
Once the skin starts to pull away after cooking, peel it off gently so the flakes stay intact and tender. You’ll feel connected to the process as you do skin removal and bone extraction with care. Use tweezers or clean fingers to find any pin bones, then ease them out toward the tail to avoid tearing flakes. Work in short gentle motions and check along the grain for concealed bones. This helps your dish feel safe and shared whenever you serve it.
| Texture | Tool | Action |
|---|---|---|
| Flaky | Fork | Separate along fibers |
| Silky | Tweezers | Pull pin bones out |
| Warm | Hands | Test for skin bits |
| Tender | Knife | Trim stubborn skin |
| Ready | Eyes | Inspect before serving |
Store or Use Flaked Salmon Properly
Storing flaked salmon properly keeps it safe and tasty, and you’ll feel relieved once you know it’ll still taste great later. Cool flakes to room temperature, then put them in an airtight container. Label with the date so your group knows at what point to eat it. Refrigerate up to five days or use portion freezing for longer life. Once you thaw, do it in the fridge overnight to keep texture gentle and safe.
You’ll love having go to choices for leftover recipes ready. Try these ideas to build meals and share with friends
- Mix with mayo and herbs for sandwiches
- Toss with warm rice and soy for bowls
- Add to salads for extra protein
- Fold into egg bakes for brunch