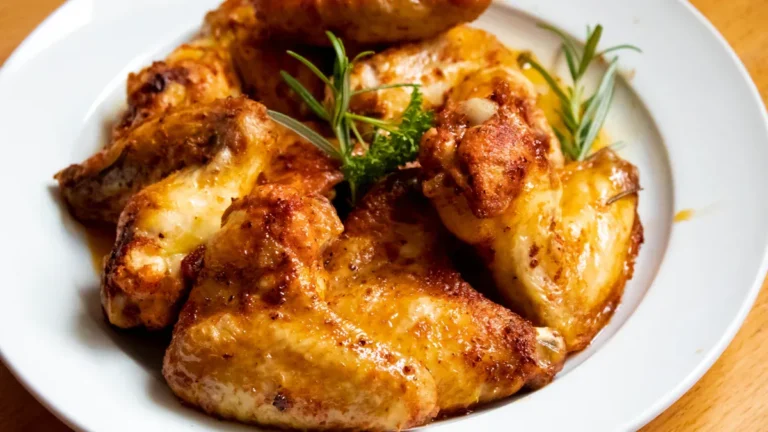
Whether to put a lid on chicken during roasting depends on what you want to achieve. Covering the chicken traps steam, which keeps the meat moist and tender, especially during slow roasting at lower temperatures. On the other hand, roasting without a lid at higher heat crisps the skin, creating a golden, crackling finish. A popular approach is to start roasting covered to lock in juiciness, then uncover near the end to let the skin dry out and become crispy as the interior reaches the safe temperature of 165°F. This balance allows for tender meat without sacrificing that desirable crisp skin.
Understanding Lid Usage in Roasting Chicken
Whenever it comes to roasting a chicken, one of the initial choices a cook faces is whether to use a lid or leave the pan uncovered. Using a lid traps steam, which keeps the meat tender and moist but can soften the skin. This method often means a longer cook time at a lower temperature, letting flavors infuse deeply into the meat.
Without a lid, the chicken roasts at a higher heat, crisping the skin and creating a golden finish. The uncovered method also makes equipment cleaning easier since less moisture builds up. Both approaches offer unique benefits, and the right choice depends on the desired texture and flavor infusion.
Roasting With a Lid: Lower Temperature, Longer Time
Roasting a chicken with a lid means cooking it at a lower temperature for a longer time, which helps keep the meat juicy and tender.
The trapped moisture from covering prevents the skin from crisping but makes the chicken fall-off-the-bone soft.
This method balances texture through focusing more on moisture retention and gentle cooking rather than the golden, crispy skin achieved by roasting without a lid.
Temperature and Time
Why does cooking a chicken with a lid call for a different temperature and timing? Low temp roasting under a lid traps steam, gently breaking down connective tissue for fall-off-the-bone tenderness. Without a lid, rapid searing at high heat crisps the skin quickly. The choice shapes both texture and flavor.
| Method | Temp Range (°F) | Time Range (min) | Texture | Skin Result |
|---|---|---|---|---|
| With Lid | 300–350 | 120–180 | Tender, moist | Soft, pale |
| No Lid | 400–450 | 60–90 | Firm, juicy | Crispy, golden |
| Lid, then off | 325, then 425 | 90, then 30 | Balanced | Crispy finish |
| Spatchcocked | 425 | 45–60 | Even, juicy | Crispy all over |
| Cast Iron | 400 | 75–90 | Rich, crisp | Deep brown |
Moisture Retention
While cooking chicken at a lower temperature with a lid, the trapped steam plays an essential role in keeping the meat moist and tender. This humidity control prevents the meat from drying out, promoting juiciness and a ‘fall-off-the-bone’ texture.
The lid captures moisture released during cooking, creating a steamy environment that helps dissolve connective tissues gently over time. This mirrors how brine effects work in enhancing moisture retention within the meat before cooking.
However, this moist atmosphere also softens the skin, stopping it from crisping up. As a result, lidded roasting requires a longer time to reach safe internal temperature while preserving flavor and tenderness.
Balancing humidity with heat therefore becomes critical for achieving succulent chicken that remains juicy inside without sacrificing safety or texture during roasting.
Texture and Tenderness
Lower heat combined with a covered roasting environment allows chicken meat to cook slowly and gently, resulting in an exceptionally tender texture that often falls off the bone. This method uses moisture retention to soften the connective tissue thoroughly, breaking it down over extended cooking time for a rich mouthfeel contrast between meltingly tender meat and the surrounding skin.
Cooking with a lid traps steam, which prevents the skin from crisping but deeply retains juiciness and tenderness. This slows evaporation, keeping the muscle fibers moist and enhancing succulence. However, this also reduces the dry heat needed for crisp skin, making the texture more uniformly soft.
All in all, lid-covered roasting expertly balances thorough connective tissue breakdown with moistness, providing an indulgent, tender bite that rewards patience and careful temperature control.
Roasting Without a Lid: Higher Heat, Crispy Skin
Roasting a chicken without a lid usually involves cooking it at a higher temperature, which encourages the skin to become golden and crispy. This method relies on high heat searing to lock in juices and create a flavorful crust. Airflow management is key, as the open pan allows hot air to circulate around the bird, promoting even browning. The skin crisps up beautifully, while the meat stays moist inside.
For best results, position the chicken breast side up and avoid covering it unless the skin browns too quickly. In case that happens, a loose foil tent can protect it. Using a rack lifts the chicken, letting heat reach all sides and ensuring the bottom skin gets just as crisp. This approach rewards patience with a satisfying crunch and juicy interior.
When to Cover Chicken During Roasting
Sometimes, even while following a recipe to the letter, the skin on a roasted chicken can start to turn too dark before the inside is fully cooked. This is at which point understanding the right cover timing becomes essential.
At the point the skin reaches the desired golden brown but the internal temperature is still below 165°F, it’s wise to cover the chicken with the roasting pan lid or a loose foil tent. This method prevents the skin from burning while allowing the meat to finish cooking evenly.
Covering at the right moment guarantees the meat cooks thoroughly without sacrificing the attractive skin color. After roasting, resting periods under loose foil help the juices redistribute and continue gentle carryover cooking, enhancing tenderness and flavor balance.
Proper cover timing links cooking progress to ultimate texture perfection.
How to Prevent Premature Browning
Sometimes the chicken skin starts to turn too dark before the inside is fully cooked, which can happen provided the oven is too hot or the bird is close to the top heating element.
To keep the skin from burning, cover the pan with its lid or loosely tent it with foil, letting the meat finish cooking without over-browning.
Watching the color and using a thermometer to check the internal temperature helps avoid this problem and keeps the chicken juicy and safe to eat.
Covering Trigger Points
Keep a close eye on the chicken as it roasts, because the skin can sometimes turn a deep golden brown before the inside is fully cooked.
Whenever this premature browning happens, it is time to cover the bird to avoid burning. This cover timing can be achieved by placing the roasting pan lid or a loose foil tent over the chicken. Many cooks conduct foil experiments to find the best moment to cover, balancing the beautiful skin color with safe internal cooking.
Covering slows direct dry heat, allowing the inside to catch up to the desired 165°F without overly darkening the skin. This method prevents the frustration of burnt skin and undercooked meat, ensuring both texture and safety remain ideal as roasting continues.
Temperature Monitoring
Monitoring temperature closely during roasting is essential to prevent premature browning of chicken skin while allowing the meat to cook safely and thoroughly. A digital meat thermometer is the best tool for this job. Place the probe into the thickest part of the thigh, avoiding bone, for accurate readings. This spot gives the truest sense of doneness.
In the event the skin browns too fast but the meat is still under 165°F, cover the bird loosely with foil. Timing charts help guide at what point to check the temperature, especially for different sizes and methods. Carryover cooking means the chicken will keep cooking after removal from the oven, so timing matters. Proper probe placement and timing charts guarantee juicy, safe results every time.
The Role of a Roasting Rack
Placing a roasting rack under the chicken makes a real difference in how the bird turns out. The rack’s key benefit lies in airflow dynamics: by lifting the chicken off the pan, heat and air circulate evenly around all sides, preventing soggy skin and ensuring more uniform cooking. Proper rack placement-whether flat or V-shaped-stabilizes the bird and allows juices to drip away, which boosts the crispiness on the underside.
| Aspect | Benefit |
|---|---|
| Airflow dynamics | Promotes even heat distribution |
| Rack elevation | Prevents chicken sitting in juices |
| Skin texture | Results in crisper skin, especially underneath |
| Cooking evenness | Improves consistent browning and doneness |
| Rack types | Flat or V-shaped, influencing how the chicken rests |
Thus, a roasting rack plays an essential role in balancing texture and cooking efficiency.
Benefits of Lifting Chicken Off the Pan
2. Improved pan drainage, which stops the skin from sitting in fat and moisture.
3. A crispier, golden skin achieved through exposing all resting surfaces to dry heat.
These factors combine to deliver a roast chicken featuring tender meat with a satisfying, crackling skin texture.
Preparing Chicken Skin for Optimal Crispiness
Getting the skin perfectly crisp on a roasted chicken starts long before the oven door closes. The key lies in preparing the skin to encourage dryness and proper fat rendering. Gently loosening the skin from the meat creates an air gap, reducing moisture transfer from the meat to the skin, which often hinders crisping. Poking small holes in fat deposits underneath allows excess fat and moisture to escape, enhancing how evenly the skin browns.
Employing techniques like herb buttering under the skin combines flavor infusion with moisture control, contributing to both taste and texture. Though marinades provide flavor, excessive moisture can delay crisping, so marinade penetration should be balanced to avoid damp skin. These careful steps set the stage for that coveted golden, crispy finish.
Techniques for Loosening and Drying the Skin
Loosening the chicken skin before roasting creates a small gap between the skin and the meat, which helps the skin dry out and become crispier during cooking.
Poking holes in the fat deposits under the skin also allows moisture and melted fat to escape, reducing greasiness and promoting even browning.
These techniques work together to improve the texture and flavor through preventing moisture from the meat from making the skin soggy.
Skin Separation Techniques
For anyone looking to get that perfectly crisp, golden skin on a roasted chicken, starting with the skin itself makes all the difference.
Proper skin separation techniques help create a barrier between the meat and skin, allowing for better fat rendering and crispiness. This process also supports collagen breakdown, which leads to tender, juicy meat. Here are three key steps to perfect:
- Gently slide fingers under the skin to loosen it from the breast and legs, creating an air gap.
- Use a skewer to poke small holes in fat deposits beneath the skin, helping moisture escape.
- Apply seasoning or butter under the skin, which improves flavor and aids in bonding methods for even browning.
These steps set the stage for a beautifully textured roast, making every bite satisfying.
Moisture Release Methods
Preparing the skin properly goes beyond just separating it from the meat; managing moisture trapped under the skin plays a big role in the roasting result. Steam infusion occurs whenever moisture gets trapped, making the skin soggy instead of crispy. Brine methods can add flavor but also increase moisture, so drying the skin after brining is key. Poking small holes in fat deposits helps steam escape, while air gaps between skin and meat let heat circulate. This keeps the skin dry and helps it crisp up.
| Technique | Effect on Moisture |
|---|---|
| Skin separation | Lets steam escape |
| Poking fat holes | Releases trapped moisture |
| Air gaps | Prevents soggy skin |
| Drying after brine | Reduces steam infusion |
Drying for Crispiness
Achieving irresistibly crispy chicken skin starts with carefully drying and creating space underneath it. This air drying technique sets the stage for herb infused dryness and a golden, crackling finish. Here’s how to perfect it:
- Gently loosen the skin from the meat using your fingers, making sure not to tear it.
- Pat the skin dry with paper towels, then let the chicken sit uncovered in the fridge for a few hours or overnight.
- Rub the skin with herbs and a light sprinkle of salt, encouraging moisture to escape and flavors to deepen.
This process allows heat to circulate evenly, rendering fat and crisping the skin. The result is a beautifully textured roast that feels both comforting and impressive.
Temperature and Safety: Hitting 165°F
Cooking chicken to the right temperature is essential for safety and enjoyment. The cold chain must be maintained before cooking to prevent bacteria growth. The USDA recommends cooking chicken to an internal temperature of 165°F, which kills harmful pathogens. Using a digital meat thermometer is the best way to check doneness. Insert it into the thickest part of the thigh, avoiding bone.
Chicken continues to cook after removal from the oven, a process called carryover cooking, which can raise the temperature by several degrees. This means pulling the chicken out just before it hits 165°F will result in perfectly cooked meat. Overcooking leads to dryness, while undercooking risks foodborne illness. Monitoring temperature guarantees both safety and delicious results.
Balancing Texture: Skin Versus Meat
Balancing the texture between crispy skin and tender meat is a classic challenge in roasting chicken. Achieving this balance requires managing heat, moisture, and timing to secure flavor infusion while maintaining appealing presentation plating.
Key factors include:
- Roasting uncovered at higher temperatures promotes dry heat that crisps skin beautifully, rendering fat for a golden finish prized in presentation plating.
- Covering or lidding the pan traps moisture, slowing skin browning but results in juicier, fall-apart tender meat thanks to steam infusion enhancing flavor infusion.
- Skin preparation such as loosening skin from meat creates air gaps preventing moisture migration, helping skin dry and crisp without compromising tender meat beneath.
Wrap up
Roasting chicken is a dance between moisture and crispness, like tending a glowing ember beneath a velvet sky. Keeping the bird covered traps steam, tenderizing the meat like a gentle mist nurturing a blooming flower. Removing the lid near the end allows the skin to dry and crisp, converting it into a golden crust that crackles like autumn leaves underfoot. This balance is the art of savoring both juicy flesh and a perfectly roasted skin.